Custom Keyboard PCB
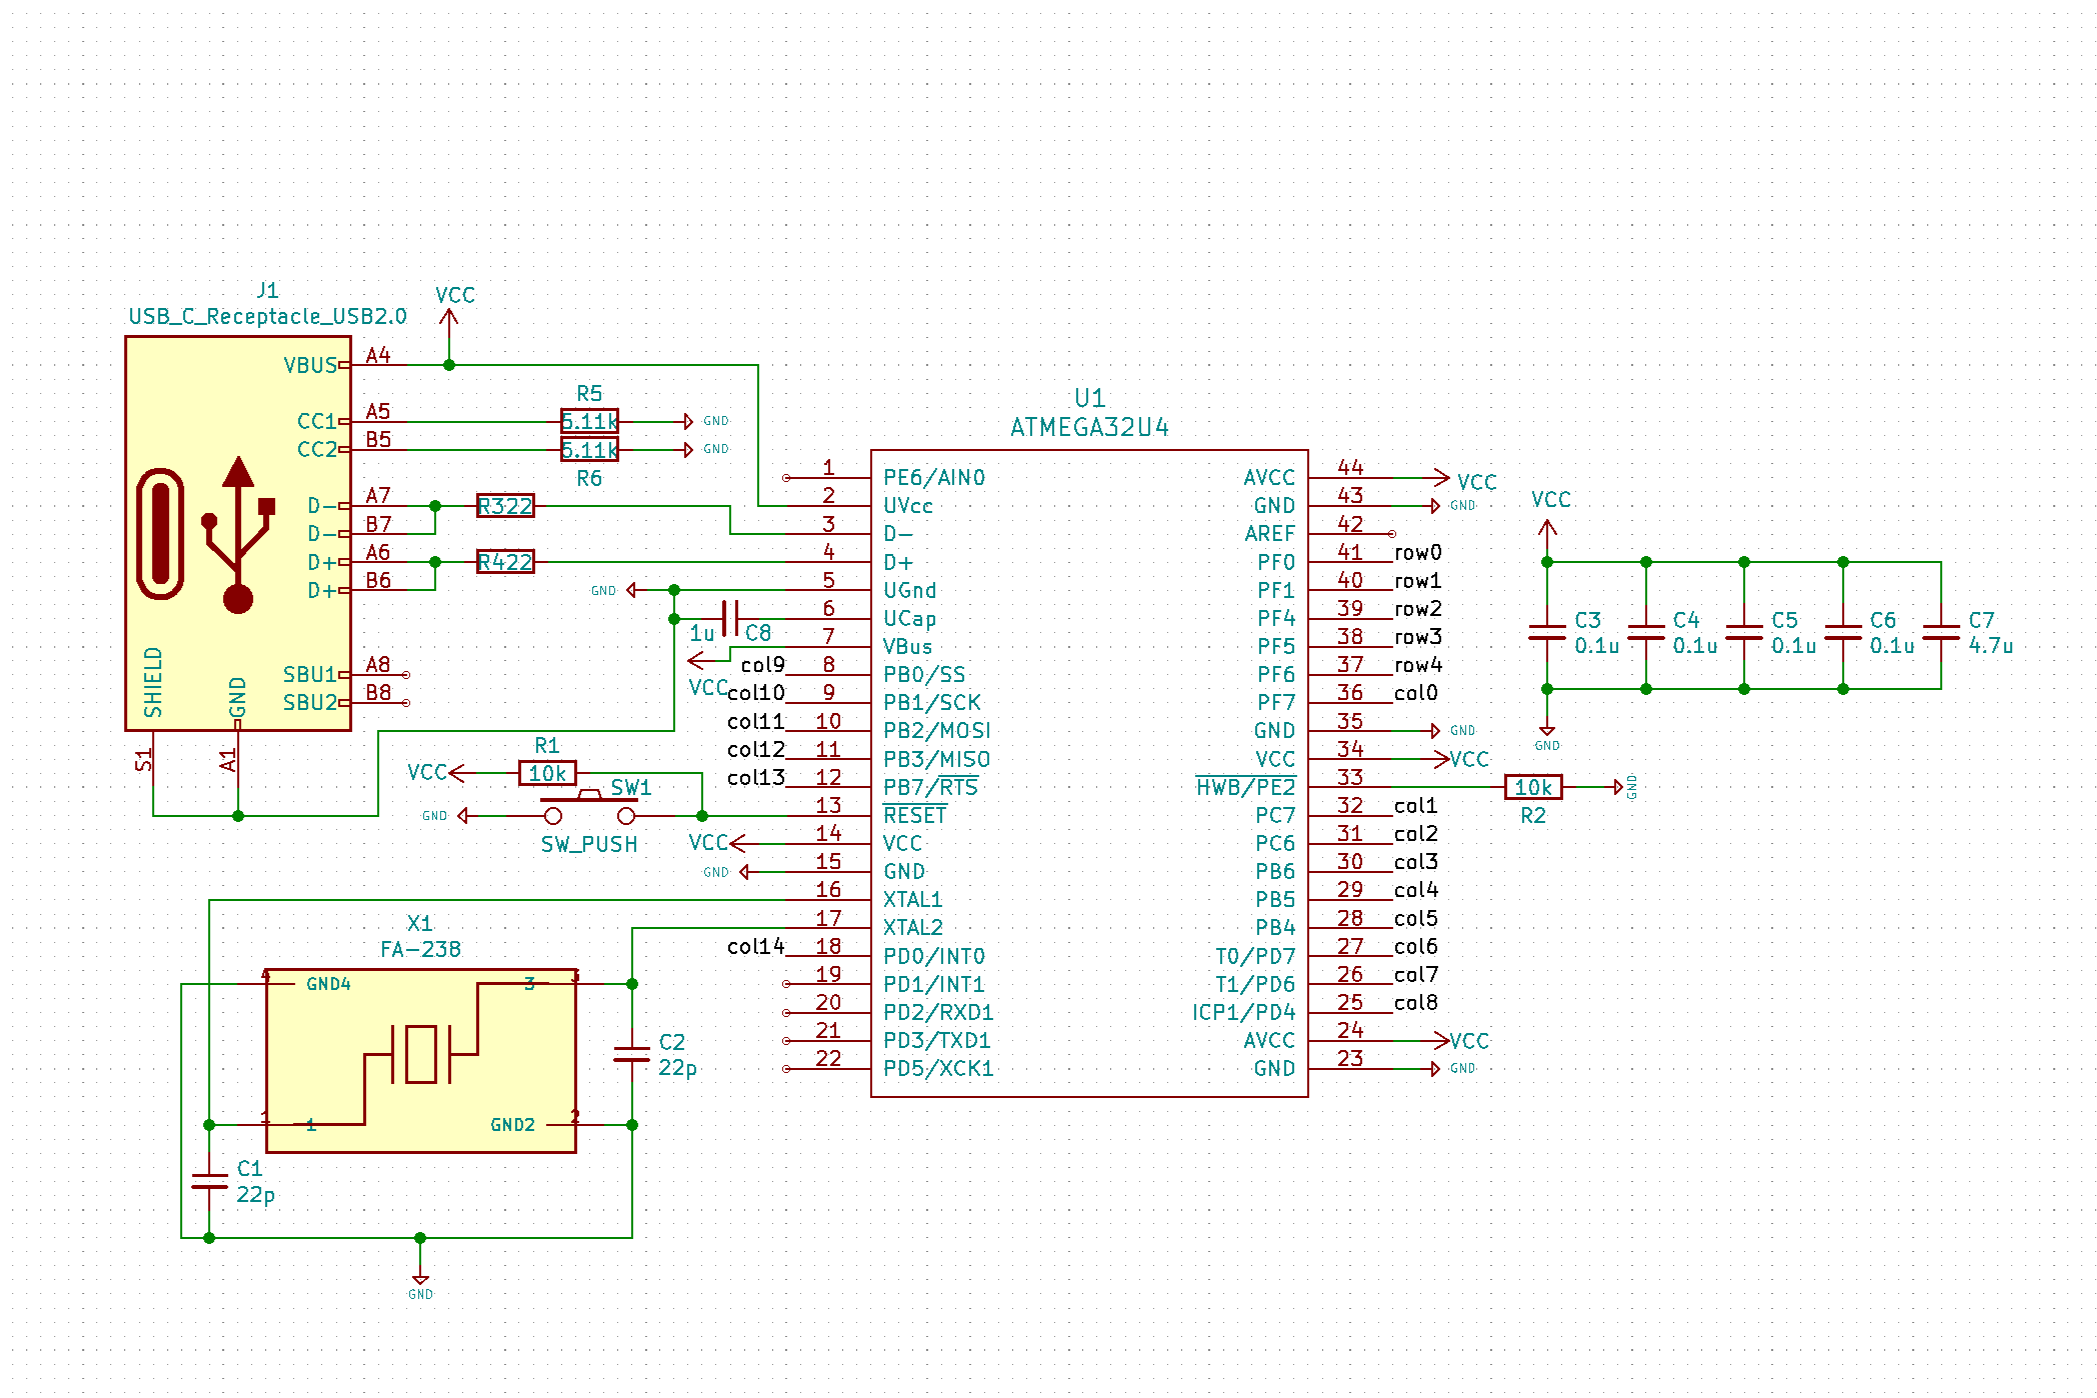
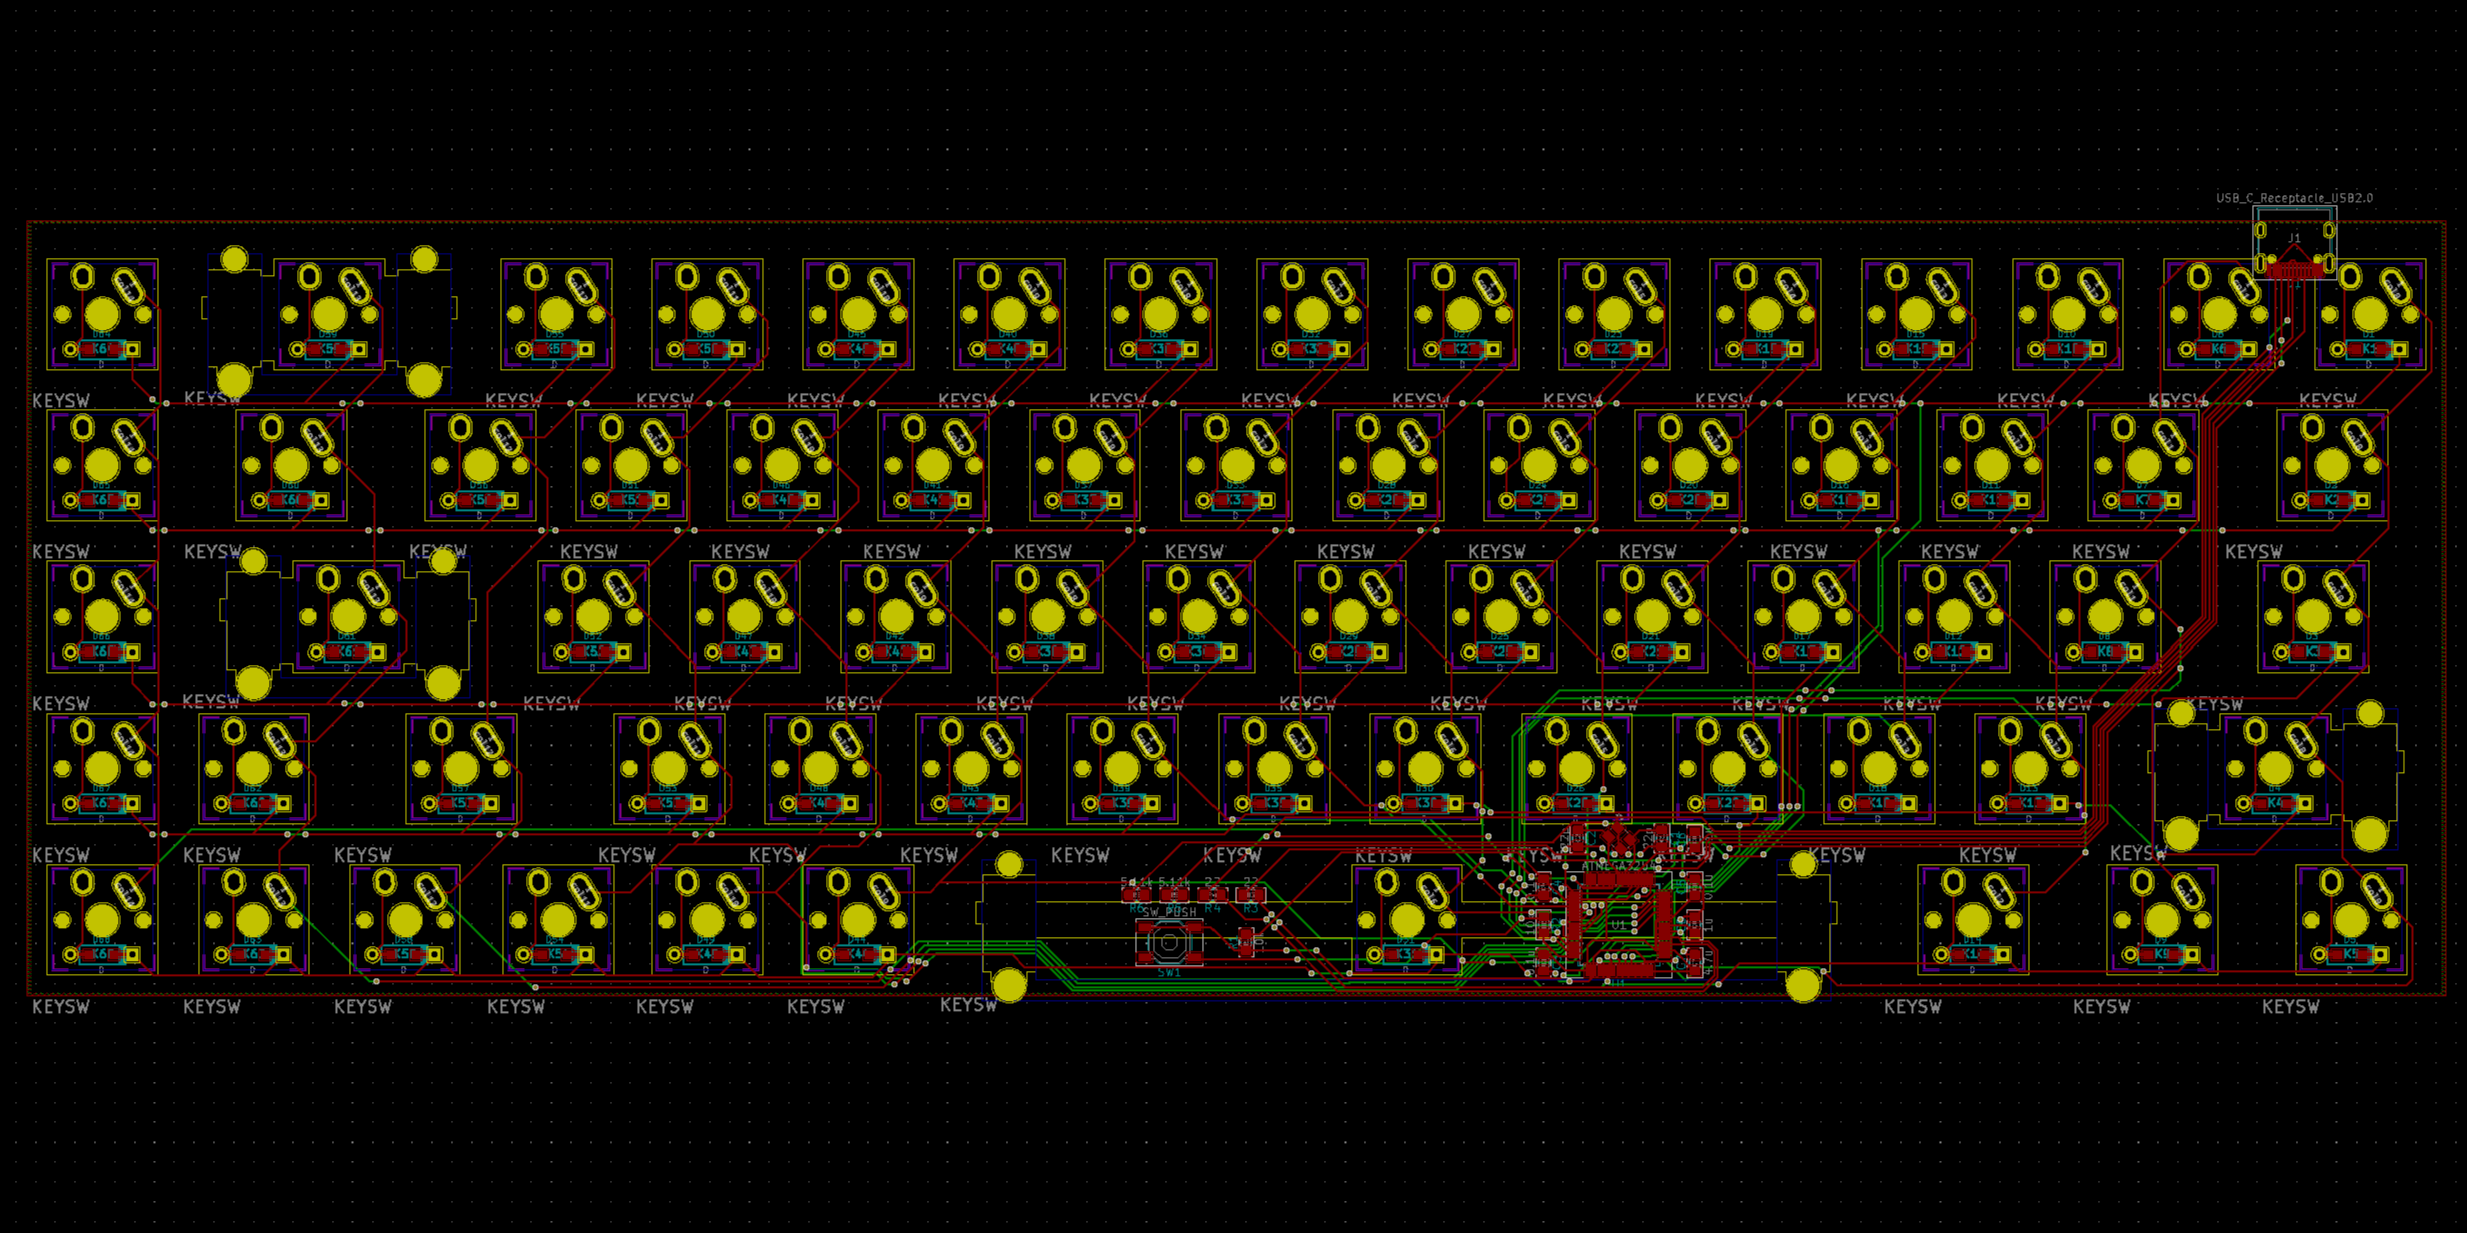
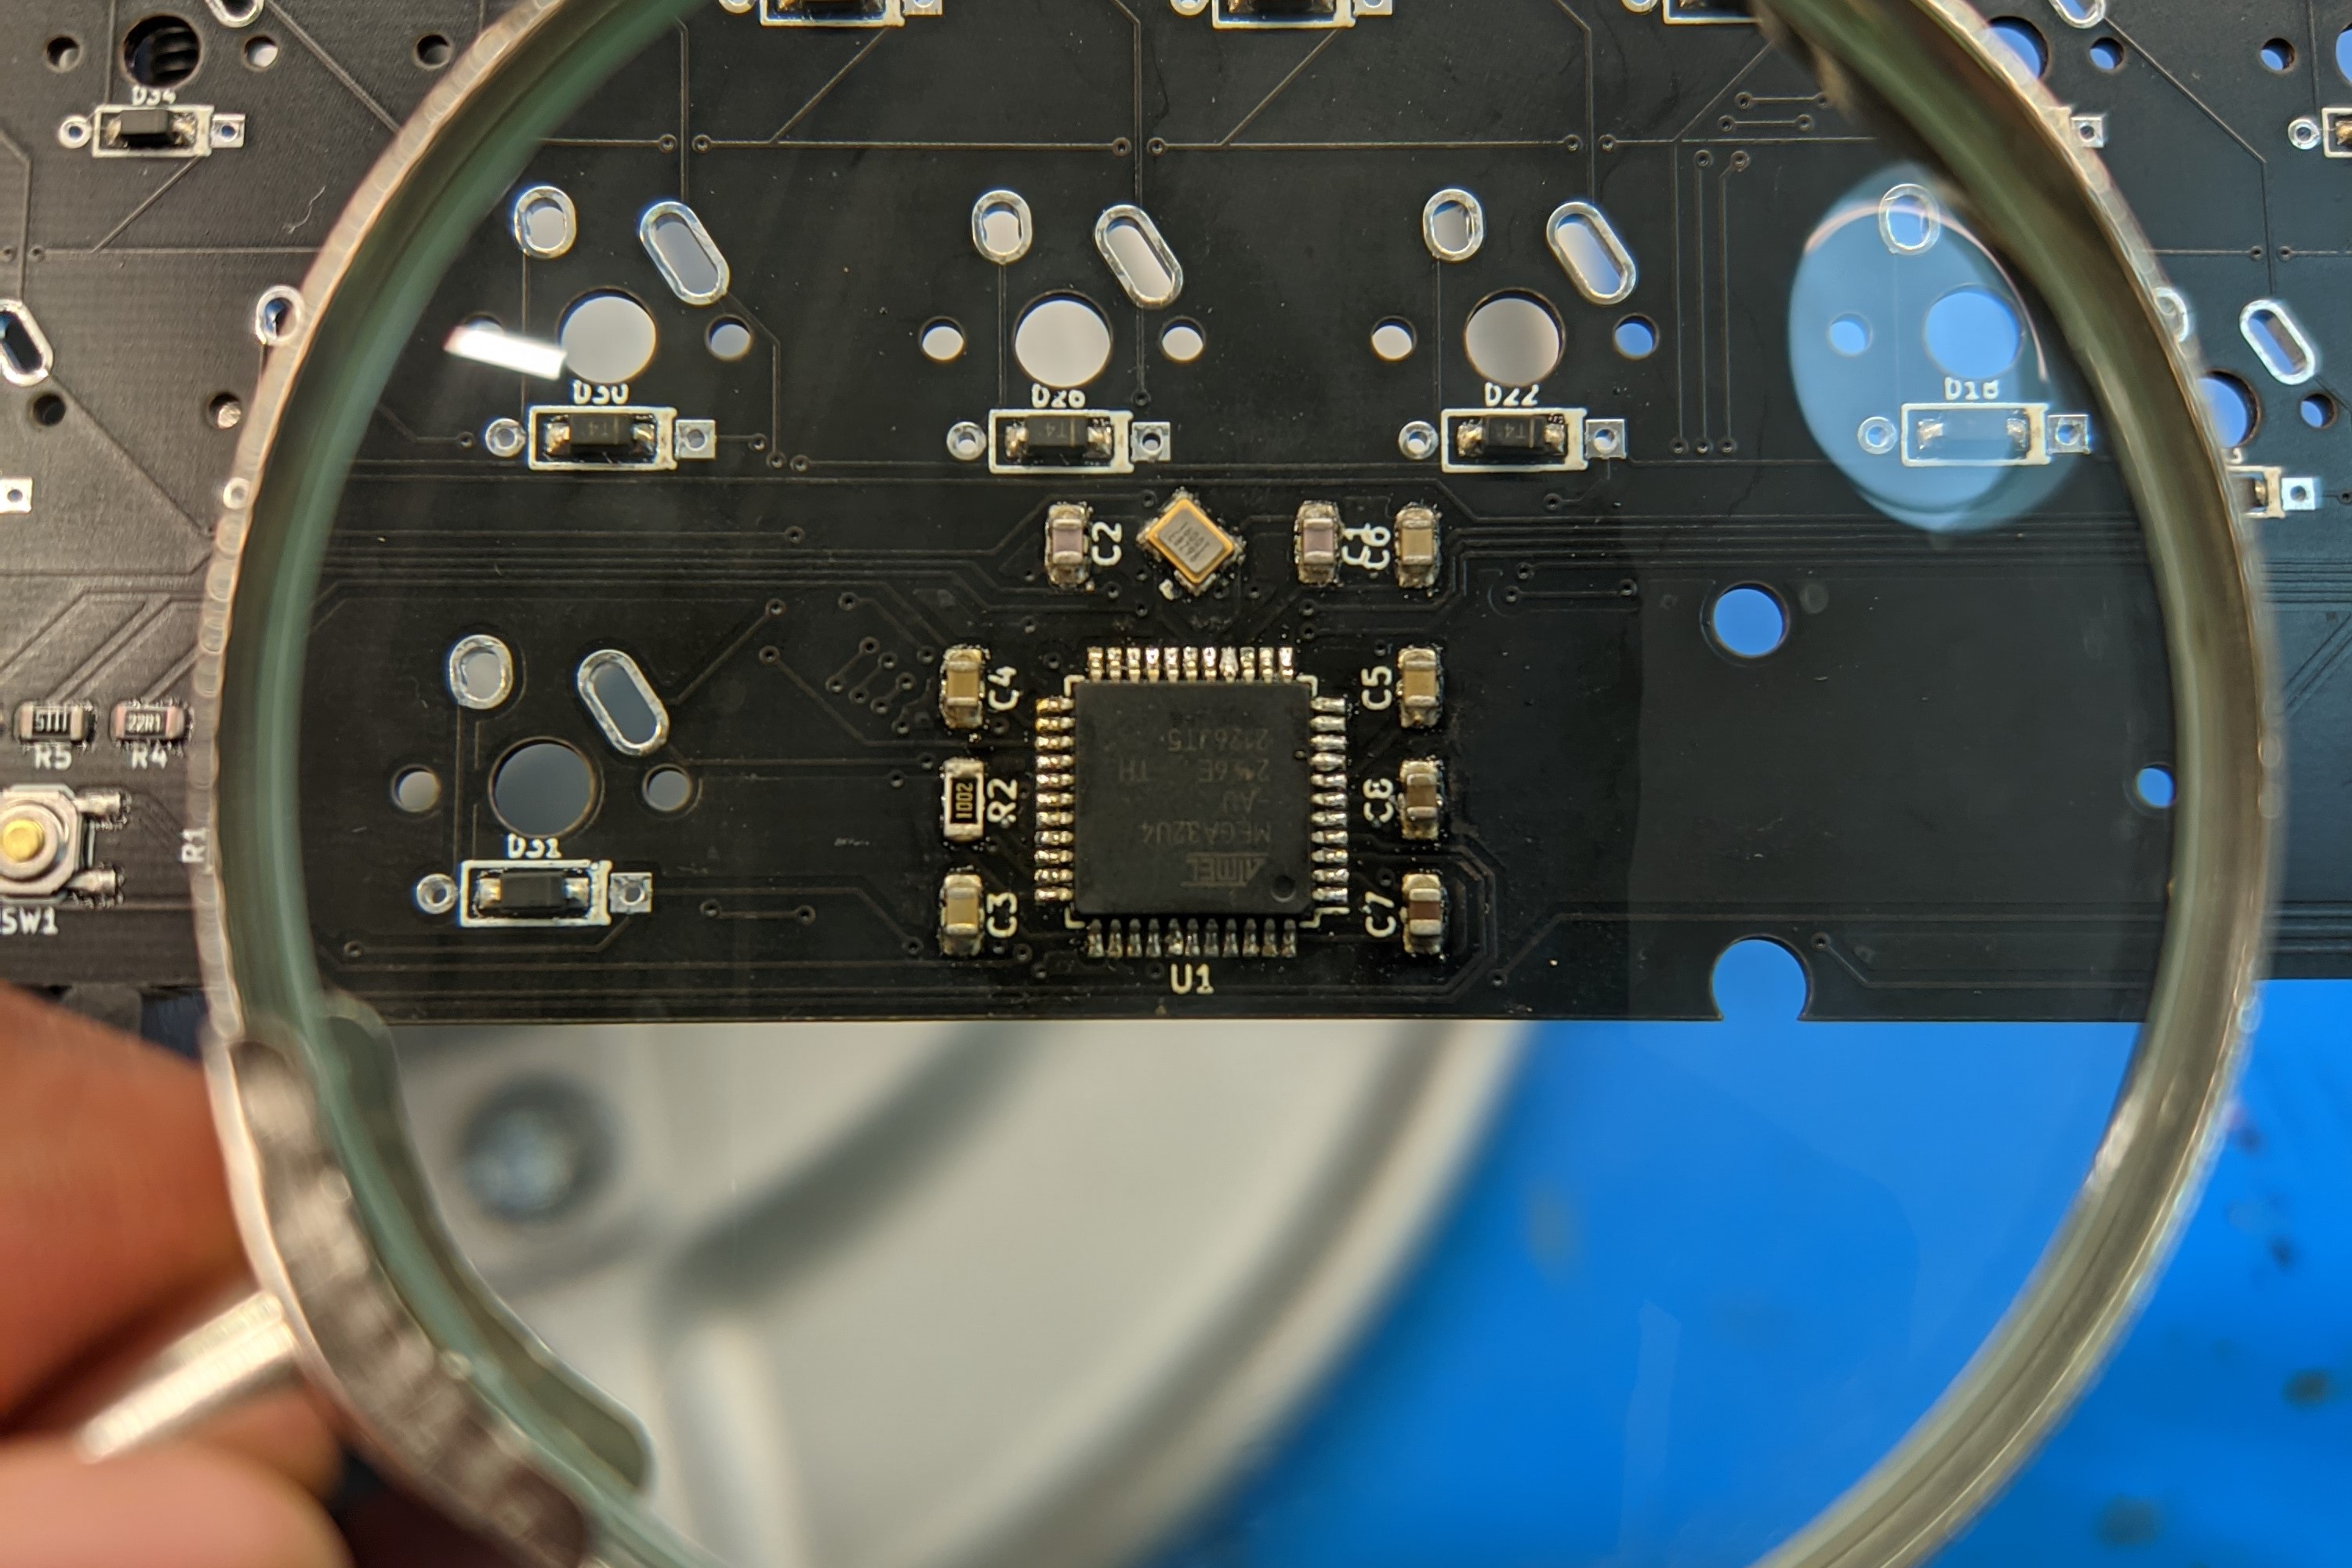
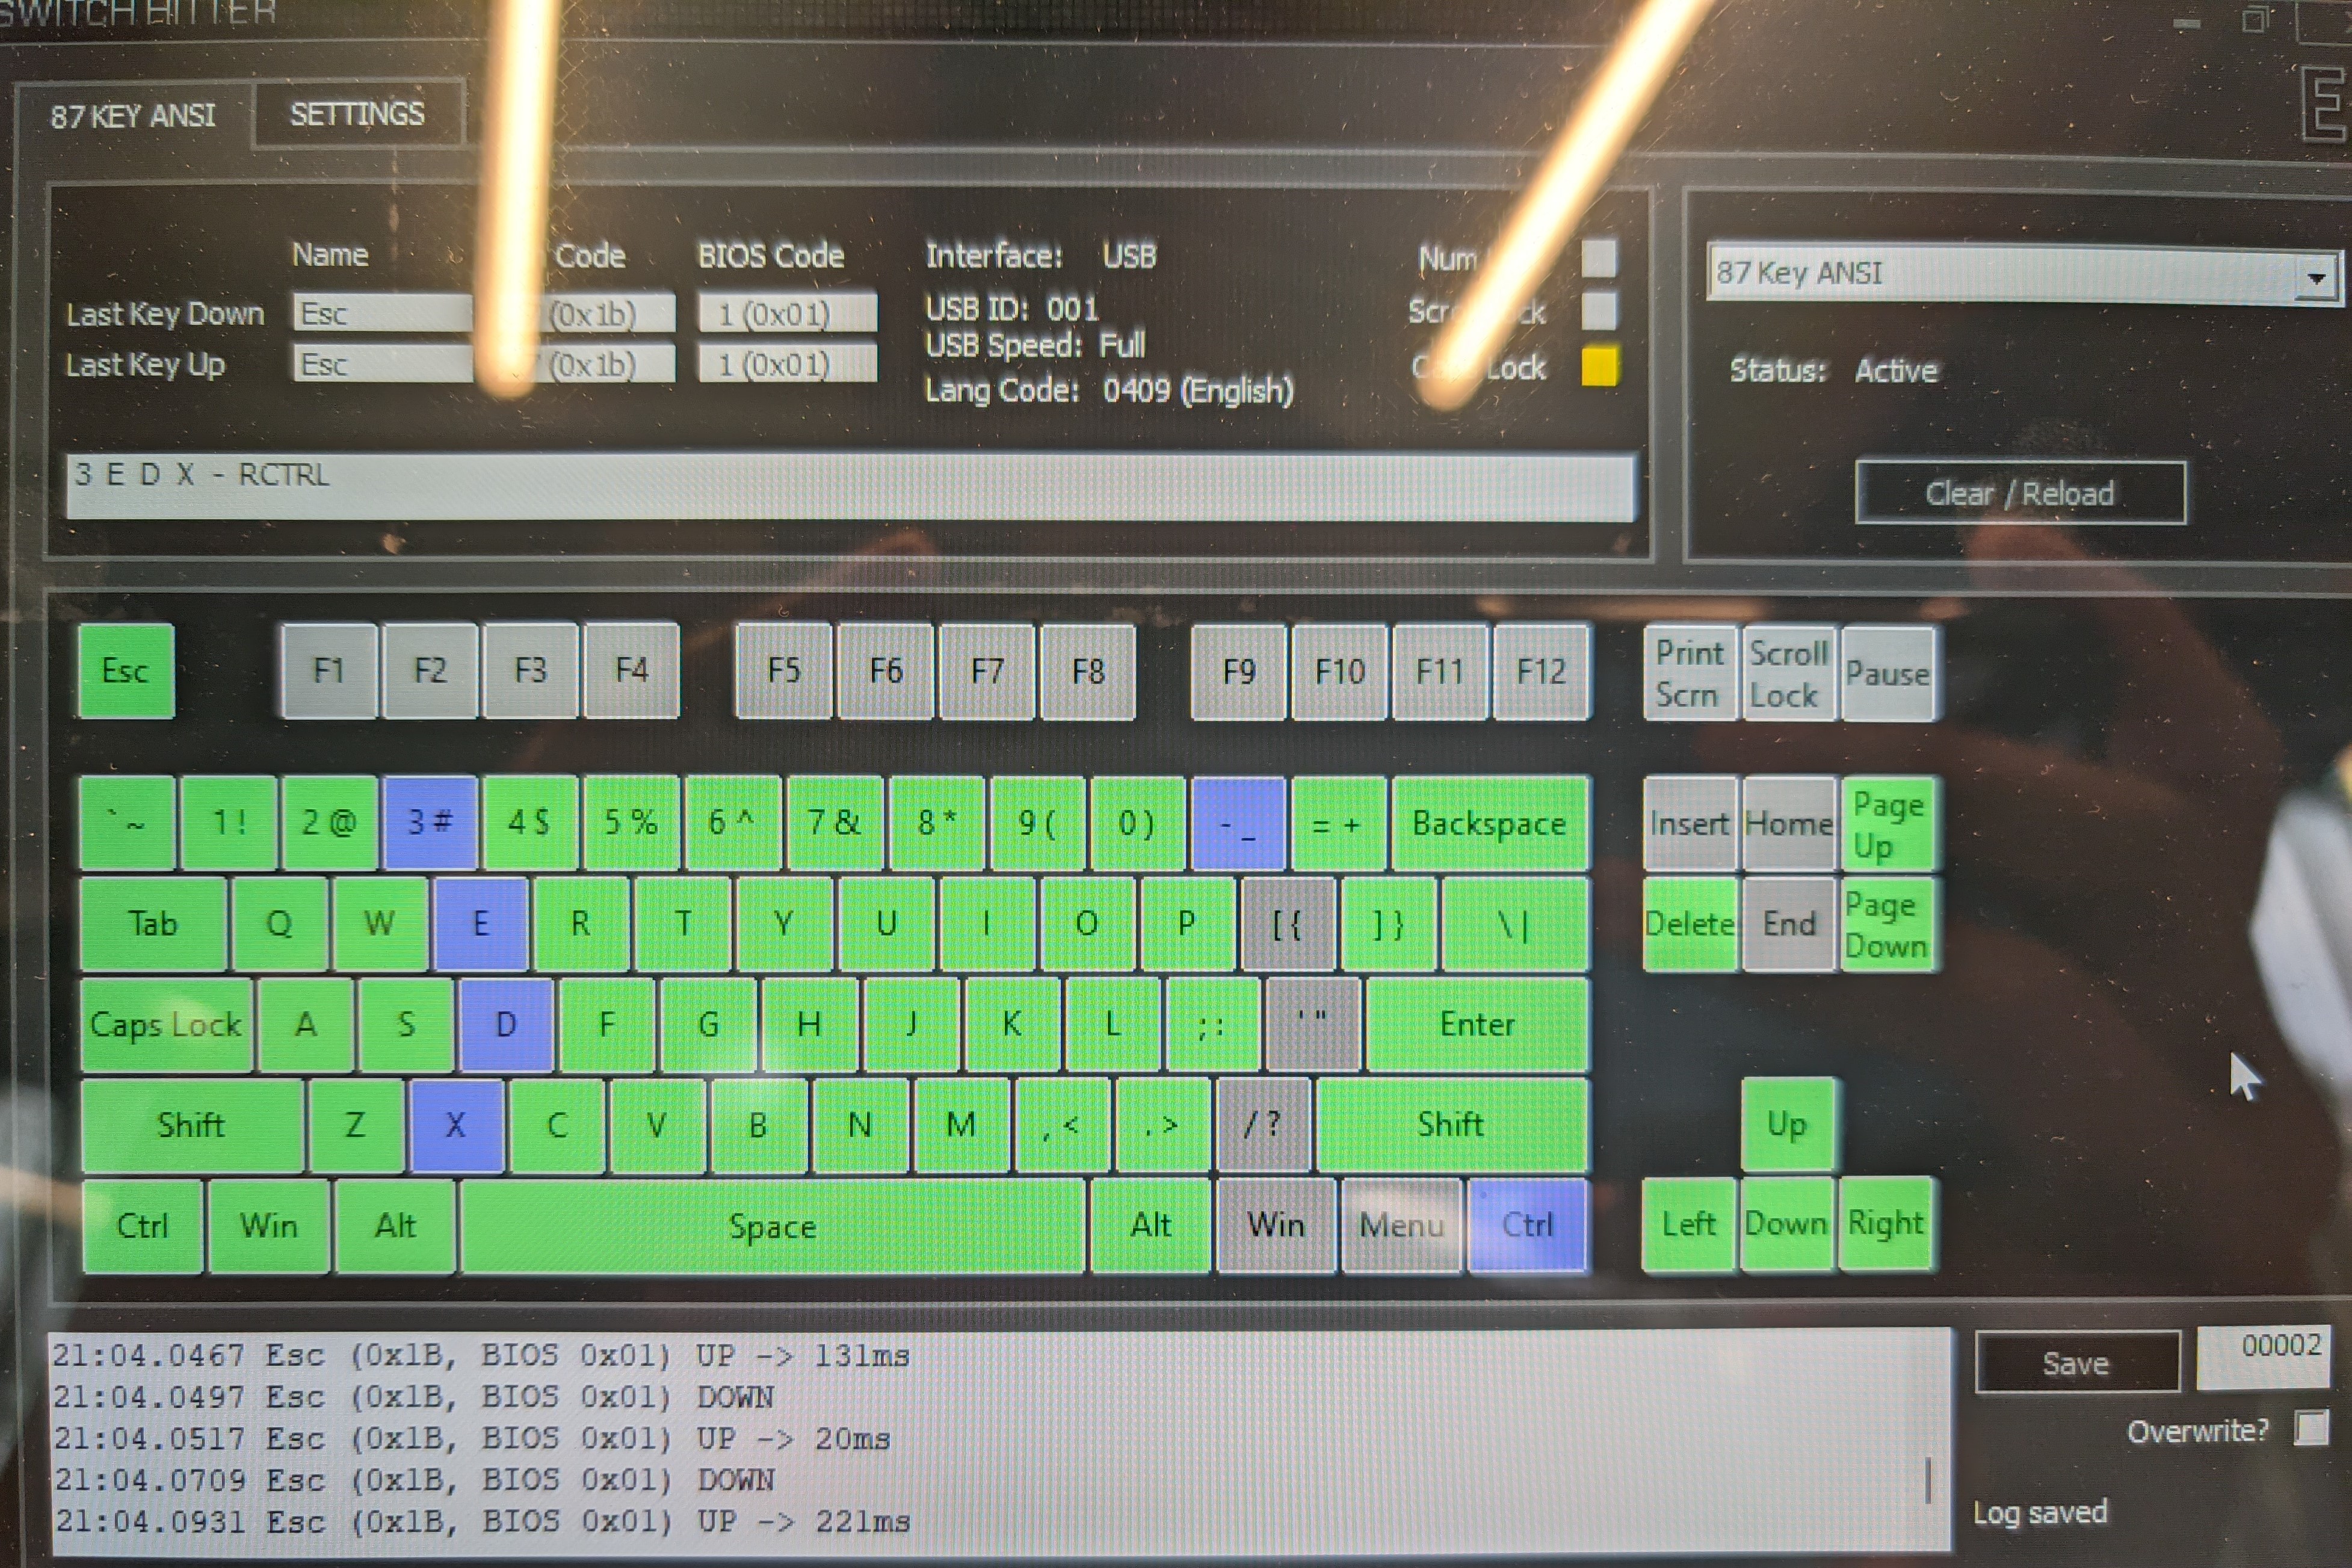
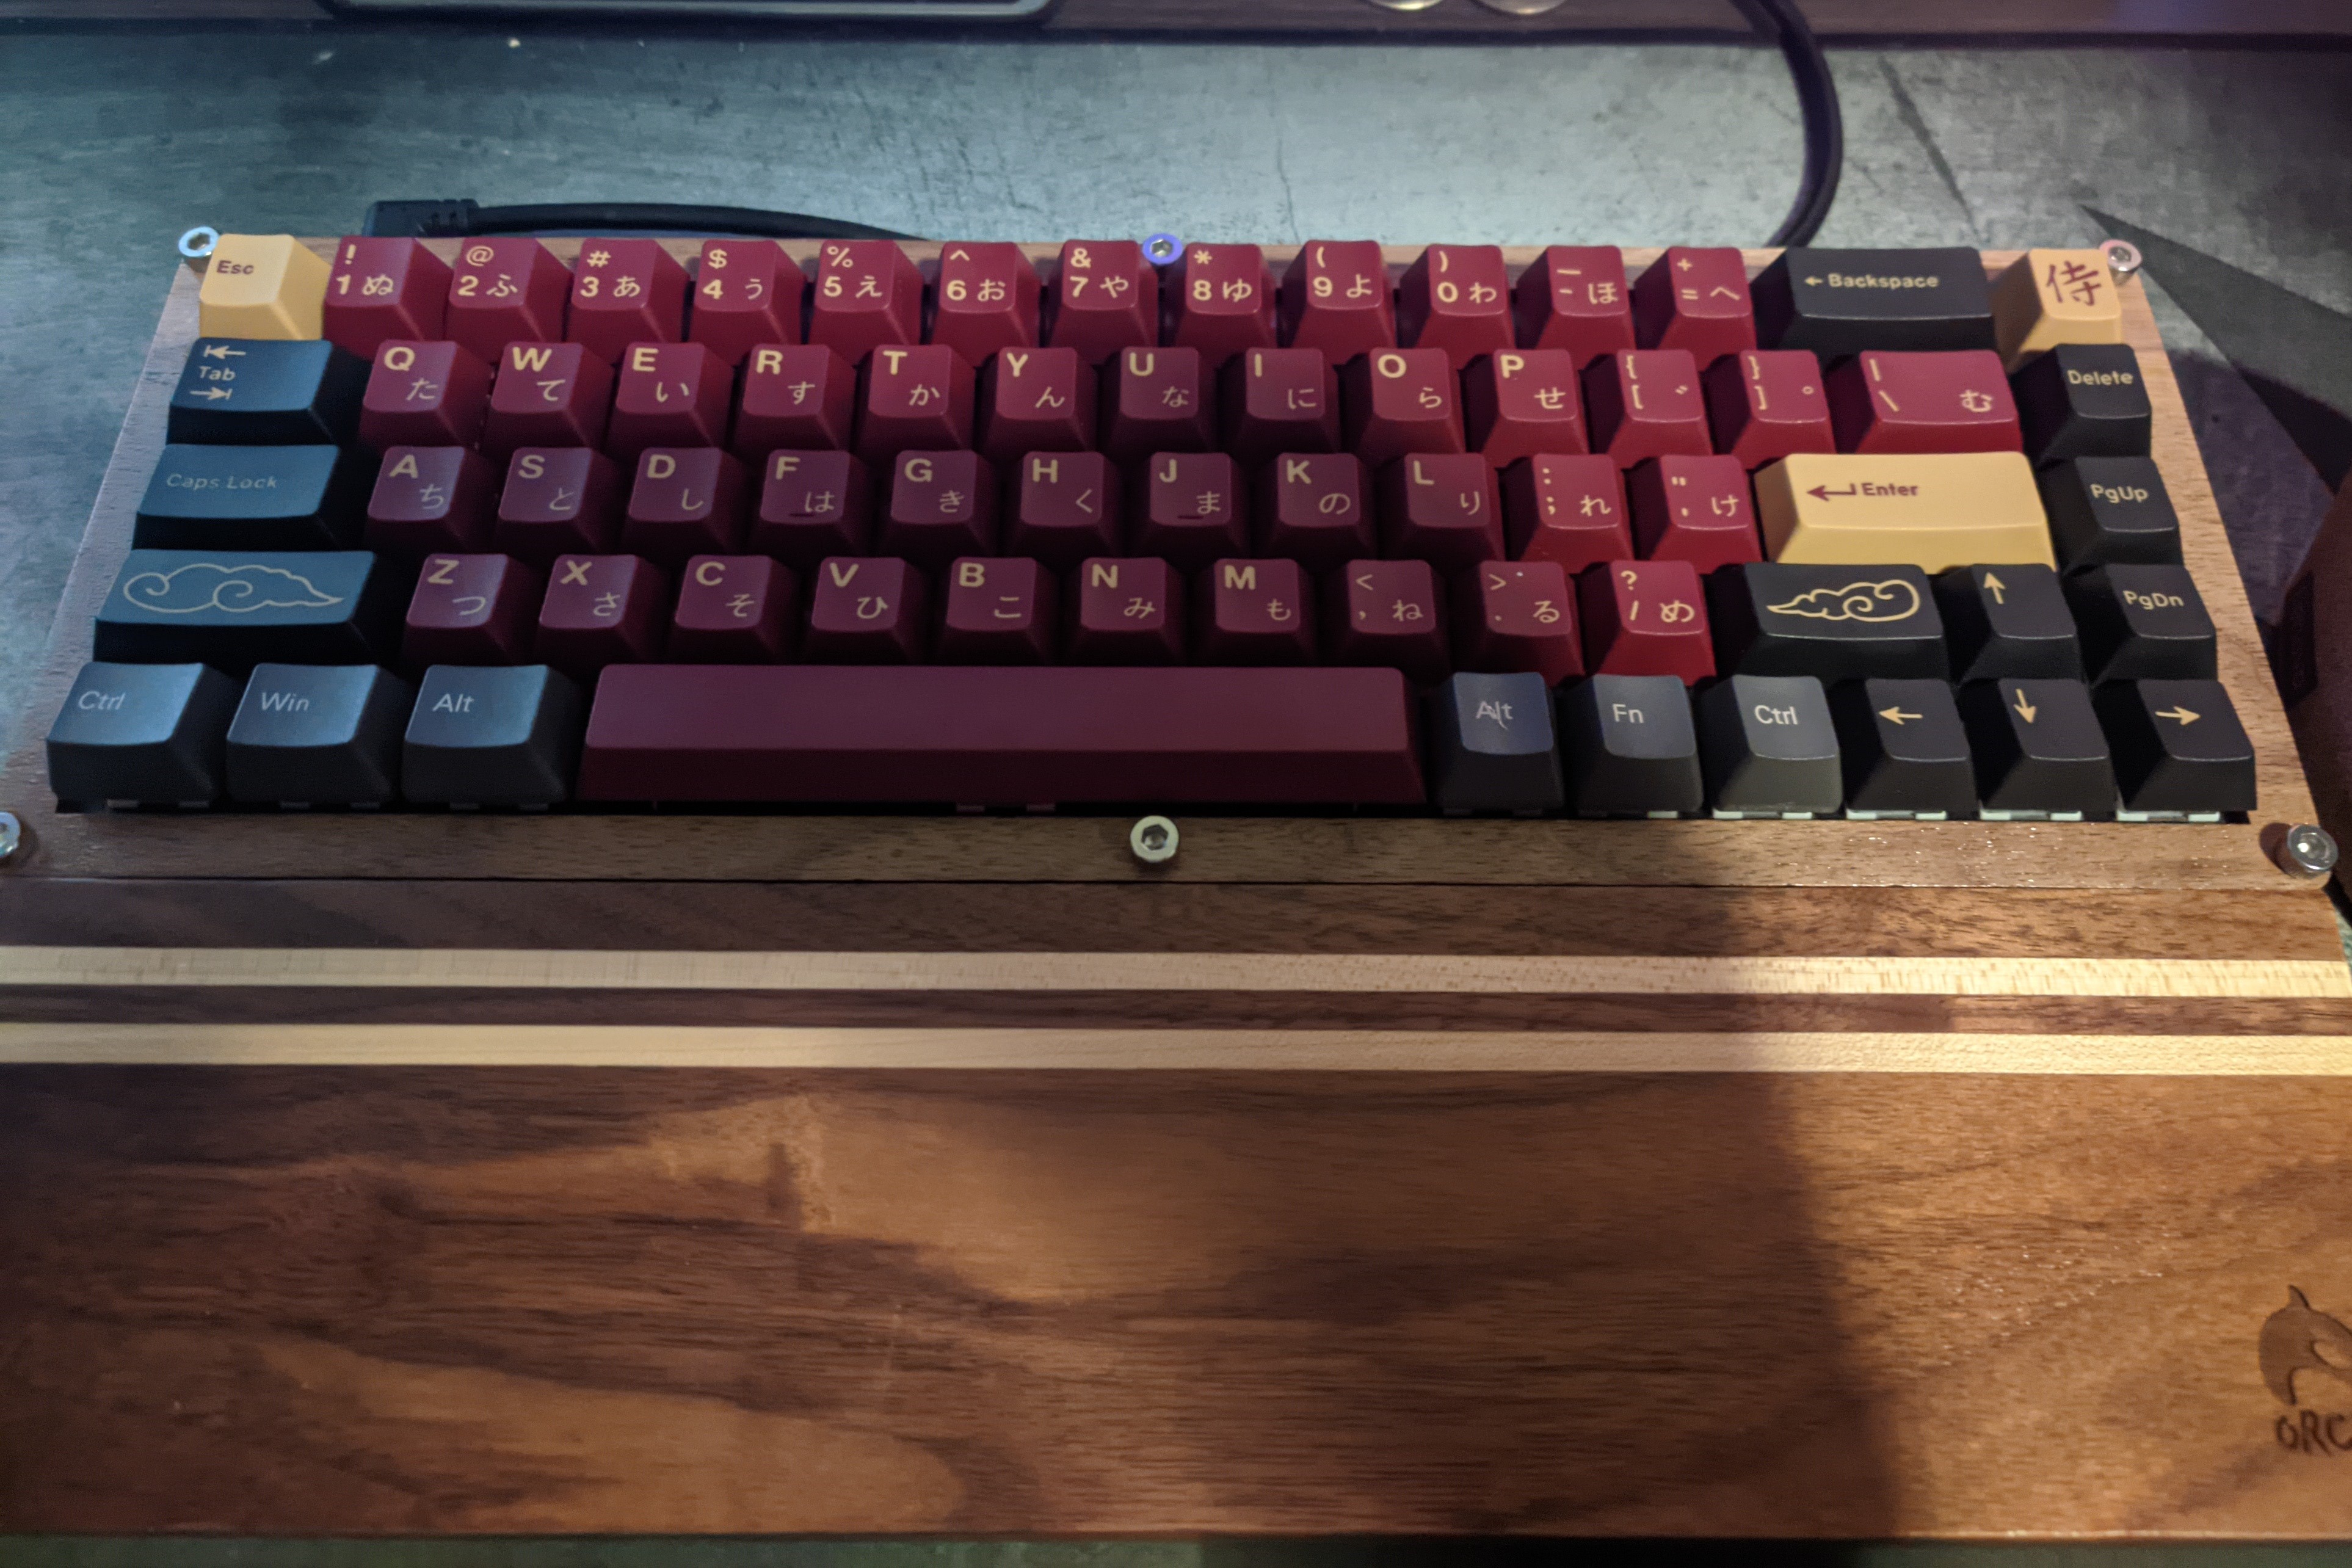
Rather than just buy an existing keyboard kit, I thought it would be a lot more fun to design a keyboard myself from the ground up! I learned how to use KiCad in order to design the schematic and board layout of my keyboard, then sent the PCB to be manufactured by JLCPCB. Once I received my PCBs, I soldered all the SMD components on using solder paste and a reflow oven, then hand soldered the keyboard switches on. Finally, I used QMK Firmware in order to write a custom C program for my keyboard to correctly function!